Unit 8
Unit Aim:
This unit will require you to make use of the skills, knowledge and understanding developed in previous units to complete an art and design project. This unit will also provide an opportunity for the student to explore in greater depth an art and design activity of their choice
Subject Aim:
Give a short paragraph here about how the unit will apply to the subject more specifically.
Primary Research
Tetsuya Nomura


Yoko Taro


Dark Souls


Final Fantasy


Kingdom Hearts
Darksiders I/II


NieR: Automata


Leonardo DaVinci


Mythological weapons from stories


Development
Swords


Fantasy World


City Layout (Basic) + Storyboard


Tetsuya Nomura is my favorite Game Designer as well as one of the most successful ones when it comes to fantasy and RPG games, therefore I decided to research some of his concept art and games and will use them as an influence when carrying out my project.
Yoko Taro is known for his uniqueness when it comes to designing his RPG and fantasy games as they usually stand out for being incredibly different from the rest of games from this genre. I decided to research his work because I found that he would be a good influence and inspiration because looking at his work I can get a good idea of why his games stand out and follow that to make my own ideas as well as making my work stand out.
Dark Souls is one of the best and most successful modern RPG's as well as one of my favorite due to its environments and weapon designs. I decided to research this game to base some of my buildings and weapons on it as well as give my scene a similar atmosphere of darkness and magic. As magic is one of the key characteristics of a fantasy world, and Dark Souls has magic itself as a weapon, I thought it would be a good inspiration and influence. I chose these specific pieces of concept art as my research because I thought they had the best sense of magic and darkness. Especially the second environment, as it has magical particles and a structure built on water that adds a sense of fantasy because structures are usually built on land. I also chose these sets of weapons because they looked the most unrealistic which would add to the sense of fantasy that I am looking to achieve .
Final Fantasy is probably the most successful RPG of all and one of the most popular ones, so based on this I thought it would be a perfect game to research as it has an abundant amount of magical weapons and spells, as well as environments that are full of fantastical elements such as statues of gods and goddesses, castles and even floating structures. I chose to also research the weapons used in this series of games as their designs are really surreal and are done taking into consideration magic, which gives some weapons a magical look that I would also like to achieve myself. The game was designed by Tetsuya Nomura, who I included in my research for my Final Major Project and is possibly his most successful game.
Kingdom Hearts is a successful yet lesser known RPG. I chose to research it because it is my favorite game of this genre as well as having a large variety of environments. Some environments are dark and full of evil whilst others are light and lack evil, giving me perfect example of both sides. These environments also contain multiple magical elements to them, such as platform systems that are joined together through magical joints or floating castles. I also chose to research concept art that shows weapon design as this game has a completely unique take on weapons, as they are designed in the form of keys. I thought this research would be useful as it has originality and uniqueness to it, which I could use as inspiration to create my own weapons even if it was in this style. It is also a game designed by Tetsuya Nomura, who I have also researched in this project.
I chose to research the Darksiders series for my project as it is a game series based around an apocalypse that's full of darkness and evil, something that isn't seen much in fantasy games as these are usually just before an apocalypse or right after it. I also liked the environments because there was a high amount of variety from environment to environment. What caught my attention the most was that there were some environments that were completely dark and evil, some were completely destroyed such as cities in ruins whilst others looked like normal forests that you find in every fantasy game, full of magical beings, structures and statues.
I researched NieR: Automata because it is a game that has come out recently and was successful, which gives me an idea of what type of environments and weapons are currently popular. This is also a work of Yoko Taro, somebody that I have researched during this project. I also researched it because it is set in a post-apocalyptic environment which varies from submerged cities to deserts to cities in ruins.
I researched Leonardo DaVinci because he is one of history's most important and influential artists, as well as coincidentally being one of the first to start including fantasy in his paintings. For example, in his most famous work Mona Lisa, you can notice that his background's environment is surreal and is similar to what we classify as fantasy in the modern era.
To be as effective as possible when designing weapons and modeling them, I decided to research mythological weapons from folklore stories told around the world. My main research sources will be Japanese folklore, Arthurian legend and Norse mythology as they're the folklore that interest me the most. I will possibly design some of the weapons from them too, such as the Masamune and the Excalibur.
Throughout these screenshots I will be showing how I am creating the basic layout of my fantasy environment. It'll initially only be composed by basic boxes that will serve as a guide to where buildings and important structures will be placed. The planes that will be placed signify things such as a river or debris for blocked areas.
Here I have placed a plane that represents a river as well as a small box above it which will show a bridge that will connect one area to the other. I have also placed a type of arched pathway that will be a type of gate system which will lead the character into this new part of the city.
I have now planned out most of the other half of the city. I decided to place 2 buildings in the middle to add some variety to the layout of the area. I also placed a basic plane that will represent some of the debris that I will create so that the character cannot go outside of this area.
This is a view of my final basic layout of my whole environment. The biggest building is intended to represent a castle. whilst the circle in the first area is a fountain. I also modified the initial area a bit to add some debris between some houses so that this part of the environment has a more free feel, as otherwise wherever you look you would only see buildings, which would make it very repetitive and give a sense of being trapped between them.
Throughout this process I often used the top view to have a clear view of what the map looks like. I therefore decided to include the top view of the final layout as it played an important part throughout this planning process.
This screenshot shows the blade of one of the swords that I planned to model, the Masamune, which is a mythological sword from Japanese folklore. I decided to model this sword because I personally believed that it is quite unique for a sword and is different from stereotypical swords that have a simple straight blade and a cross handle.
Here you can see the handle of the sword that I am modelling. This was trickier to model than the blade as the top part had to be slightly curved. However I used the Bevel tool to manage this as it makes the edges that you select more curved. I also had to resize it and re-position it a few times so that it was centered with the plane, allowing it to look right.
After modelling the handle I modeled the metallic union between it and the blade. The hardest part about this was getting the size right. as making it too big would merge it with the handle and blade and making it too small would not connect them so I had to find the perfect sizing for it as well as positioning so that the connection was as centered and straight as possible.
I decided to also make the small diamonds that came out on the handle. However, to give it a unique touch and so that it didn't look exactly like my inspiration I decided to make them stand out more, as in the normal Masamune that I researched it is embedded inside the handle.
Here I am showing how I have duplicated the diamonds to spread them across the handle. I also then mirrored them to put them on the other side of the handle.
This is my final render of my sword on Maya. To model it I used an image plane of the reference that I was using and used a plane for each individual section. For example, I placed a plane over the blade and then moved the vertices to adapt it to the shape. I also added more vertices by using the edge loop tool. When I finished modeling the image planes I extruded the outside edges and used the mirror tool to add depth to the sword's shapes.
This is an interactive 3D model of my textured Masamune sword that I uploaded to Sketchfab from Substance Painter.
I took a wire-frame screenshot of my interactive model to show how many polygons it has and what it looks like this way.
This is the blade of my second sword, based on the Excalibur. I used the same modeling technique as I did previously by using an image. I decided to model the Excalibur because it is one of the most popular mythological swords around the world.
After the blade I used another plane to model the sword handle. I moved the vertices to manipulate the shape and make it like the sword I was using as an example.
Structures


For the grip of a plane I used a plane as well as a flat cylinder, as it would've been difficult to create the circular shape through a square plane.
After this I started adding volume to the shapes so that they were 3D instead of just flat. To do this I extruded the outside edges and used the mirror tool to as this was the easiest and fastest method of adding volume to the shapes.
When I added volume to the sword I decided to use the smooth tool on some of the parts that I thought would look better this way, such as the handle and grip of the sword. I didn't do it on the blade as I thought it wouldn't look sharp enough.
Here I am showing that I remade the circular part of the grip so that it looked better as I wasn't happy with how it turned out originally. This time I used a sphere and smoothed it so that it was a similar shape to what I originally created.
This is a basic final render of my Excalibur sword before being textured.
Here I am showing how I added the blade's detail on Substance Painter. I used photoshop to crop out the detail from a photo of Excalibur. After this I turned it into an alpha by making the background black and the detail white. I imported it onto Substance Painter as an alpha and disabled all channels expect Normal and Height. I then used the brush tool to put it on the blade.
Here I am starting my third sword. Just like with the other ones I used an image as reference on the background and used a plane to model it by manipulating the vertices.
After modelling the blade I started with the handle. Once again I used a plane to model it through vertices manipulation.
Here I am showing the finished sword. To model the grip I used a plane once again. However. to model the end part of the grip I had to separately use a cylinder and manipulate it to match the shape in my reference image.
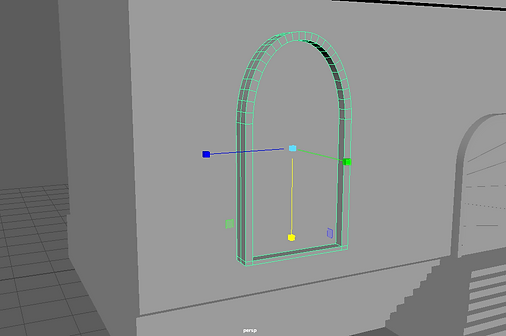
I am now showing the steps and door of my first building. To make the arch shape I used the revel tool on the edges to make it bend. After this I extruded the outside to give the door a door frame. I then use the magnet tool on the tool to put a cube on it and then manipulated this cube to make it look like a wooden plank. I duplicated this multiple times and adjusted it to look right. I did this to make it seem like the door is boarded up and inaccessible.
This is the first window of my building. I used the same technique as with the door, but with a more narrow cube so that it didn't look too wide for a window.
After this I once again used the magnet tool to create one cube and then manipulated and duplicated it multiple times to create the joints of the window frame.
This is another window that I made. This time I made it square so that it added a bit of variety to the house. Whilst making these windows I was also looking at one of my references from my research. I extruded the outside of the cube to create a window frame, and extruded the bottom part a bit more to make it look more realistic as well as similar to my research. I once again used the magnet tool to create part of the frame.
After creating this window and duplicating it I decided to join them together and make one big window to add a bit of originality so that it wasn't just me copying what I've seen on my research.
This is the balcony of my building. I used the same door that's the main entrance to make it easier for myself as well as to make the house have the same type of doors. However I changed the placement of the wooden planks so that it's not exactly the same. I then placed the base of the balcony through the magnet tool as well as the supports on it and duplicated them all.
I decided to be more creative and made a more complex window. Creating the frame was slightly complex to figure out as I had to extrude multiple times whilst rotating the face. I first created the upper one and then duplicated it onto the bottom part as it was equally shaped and would make it look better, as well as being easier than manually creating it again.
Here I'm showing the textures of the glass on the windows. To do this I adjusted the material settings inside unity. I made it white and maxed out the smoothness to make it look like it's reflective as well as making it look like the glass on some windows.
This is the water that I've placed on the river that's going through the city. I used a prefab from unity and resized it to make it adjust to the shape of the river.
I placed trees at inaccessible places where debris will also be placed so that the pathway will be blocked. the trees were added for visual purposes as well as to block the view of the empty terrain beyond them. I also placed trees at each end of the river, whilst also making the area around the river have a sand texture as otherwise this area would be made out of brick and would look the same as the rest of the city.
This is a fountain that I modeled for my city. I created this by using the extrusion method. Firstly I extruded into the inside and then downwards to create the bottom of the fountain. After this I extruded into the middle and then upwards. I repeated this process multiple times until the fountain was finished.
Once I finished my fountain I decided to use the smooth tool on it to see if it looked better this way. After checking I noticed that it does indeed look better therefore I kept it that way.
After this I exported my fountain onto Unity and added some water to it so that it looked like a real fountain that was full of water. I had to duplicate and resize it a few times to give it the most accurate look possible. I considered leaving one of the layers without water, however I decided to put water on all of them to make the fountain look fully functional and lively instead of partially functional.


This is my first step towards modelling my guard tower. I duplicated one of the doors that I made and placed it on the building, then created a base platform for the stairs and after this I created one step and duplicated it successively until I had a full set of steps.
After creating the set of steps I then created the support of the steps throughout the outside of them, whilst making them taller than the steps themselves so that it was realistic as I was looking at some reference images of medieval and fantasy towers that other people have made as well as from games and movies.
I adjusted the edges of the supports to make them look uneven as, when I looked at my reference images in more detailed, I noticed that the bricks of the wall as well as the height was slightly uneven and not perfect. Taking this into consideration I went into edge mode and moved some edges up and down to make it seem more realistic and detailed.
I also decided to move the faces of the support upwards so that it was taller, as when I imported it into Unity it didn't fit in with the overall scale of the scene and was too small when compared to my character, so I decided that it would be for the best to make the supports taller.
After I was finished with the steps I decided to add some increased detail to the basic body of the tower by adding some outer bricks that I had seen on the corners of the buildings of my reference images. I did this because I thought it would add some more realism and make it look more like a medieval guard tower.
This screenshot shows that the bricks continued on throughout the corner and didn't just stop at the edge. To do this I created a basic cube with help of the magnet tool and then extruded it towards the other wall of the building. After this I kept creating cubes and made each of them a different size and length do add some variety which would contribute towards the overall realism of my project because the guard towers that I used as reference had these.
After I finished with the detailed bricks I started on the windows. I made these more unique and different from the windows on the houses as when I was researching some medieval villages I noticed that the windows of the guard towers were more simple than the windows of normal buildings and houses. To make them I simply made four cubes, two of them vertically and two horizontally and then placed them parallel from each other. I made one and duplicated the rest.
When I finished making the windows I decided to make the upper section of the Guard Tower. To do this I extruded into the middle and then downwards to create a space where guards would stand, and then created the small walls on the upper part through constant extruding. I think duplicated this carefully to spread it out across the top and make it look even.
I then duplicated and rotated the completed guard tower to easily replicate it and place it opposite of it. Below are some screenshots of how the guard towers look inside my Unity environment.


Here I started adding some wooden supports to the buildings. After completing them I took a look at my reference images and I noticed that many medieval buildings had wooden supports throughout the walls, which I hadn't put in and started putting in now whilst looking at said reference images.
 |
|---|
 |
Reference Images


 |
|---|
 |


 |
|---|
 |


 |
|---|
 |
 |
|---|
 |
 |
Props
 |
|---|
 |

 |
|---|
 |

 |
|---|
 |
 |
 |
|---|
 |
 |
 |
 |
|---|
 |
 |

 |
|---|
 |
 |

Textured Models
 |  |  |
|---|---|---|
 |  |  |
 |  |  |
 |
First Playthrough
Particle System (Water Fountain)
 |
|---|
 |
Test 1
Test 2
 |
|---|
 |
 |
|---|
 |
 |
This is the bridge that I created. I created the floor by making a cube and then using a non-linear bend to bend it like many bridges are based on my reference images. I created the shape of the sides by extruding a simple cube. I then duplicated it and combined them to make them the same object.
This is what my bridge looks like non-textured in Unity. I will most likely re-adjust its size to make it more fitting and realistic in scale.
Here I am showing my first step towards creating the towers for my castle. To create the base I extruded downwards and then outwards. After this I extruded into the inside of it.
After this I started working on the top part of the tower. To do this I extruded outwards and then upwards to create the section where the windows will be. Then I extruded upwards and scaled the vertices to create the roof of the tower.
To create the window openings of the tower I selected every other face of this section and then extruded the face. To make them be openings I scaled them inwards.
This is how the final tower looks like. I modified the roof by selecting the vertices and scaling them to make the roof be less straight and more realistic, as that is how many towers looked like on my reference images and research.
Here I have duplicated the tower to set up the castle's base layout.
This is my first step to create the outside castle walls that connect the towers together. I used the edge loop tool to create these edges so that I am able to extrude them and create the shapes required.
Here I have extruded the lower faces that I made to create the small ledge of the outside castle wall. I didn't extrude the sides as they weren't needed because they will be joined with the towers.
This is a more advanced version of my outside castle wall. I extruded the top faces to create the small castle walls as well as extruding the backwards part that will be aiming towards the main castle in the middle.
Here I am showing a better angle to show that I have have also extruded the front faces that are under small walls to make it look more like the medieval walls of the castles that I researched.
I had to duplicate more towers as I realized that I had to make the overall inside shape bigger for the castle to fit. I also had to duplicate the castle walls multiple time to connect all of the towers together, as well as making the base cube which will be the entrance that will go on the outside walls. There is also an image of how this looks like on Unity.
Here I am showing how I modeled the entrance. The first thing I did was create a cube and after this I extruded the upper face to create the upper section. After this I selected the upper edge and then moved it upwards so that it would recreate the sort of shape that these roofs usually have. I also had to modify some edges a bit to perfect this.
After this I created some simple cones. I slightly modified their shape and size to recreate the extra objects that the roof should have.
Here I am starting to model the door of the outside entrance. The first thing I did was create a cylinder and increase its subdivisions to 30.
Once the subdivisions were at 30 I selected the lower half of the cylinder's faces and deleted them to create a semi-cylinder. I also used the fill hole tool to fill in the small gap that these deleted faces left.
After doing this I had to resize this to make its shape seem like the door of the castle tower. I also duplicated this as I was going to re-use this shape to create windows and other gates.
Once the door was correctly shaped and sized, I placed it inside the entrance and used the Boolean tool to create the door. I used difference as it would create a shape inside the entrance by using the difference between each shape. To use the Boolean tool I had to first select the castle entrance and then the door as if I selected it the other way round it wouldn't work the way I wanted it to.
This is the end result of the Boolean tool. I had to retry this multiple times to get the shape correct as well as to make the depth of the door be fitting and up to scale.
As previously mentioned, I re-used the door's shape to create some windows on the top of the outside castle entrance by using the Boolean tool.
This is the end result of the windows whilst using the Boolean tool. This time it was easier for me as I had a rough idea of how to do this from the previous door.
Here is a screenshot of how the castle was looking with what I had modeled so far. The main castle would be created next and would go in the middle of this.
This is the base cube that will be used to create the main castle. The first thing that I did to it was used the edge tool to create a face that will be extruded to create another floor of the castle.
To create this I had to extrude upwards and then scale the faces outwards as this shape required me to do this process. It was easy to do, however slightly challenging to get the shape right.
When I finished creating that section I selected the face in the middle and extruded it inwards to create another face in the middle. I then extruded once more, but this time upwards to create what would end up being the roof of the castle.
After extruding I selected the middle face once more. This time, instead of extruding I had to scale the face inwards to create this shape that would create the roof of the castle.
Once again, I reused the door to create these windows in the main castle by using the Boolean tool.
Here I have duplicated four towers to place around the tower's roof as well as duplicating the outside walls entrance to place it on top of the castle.
This is the start of my modeling process for the gateway that will connect the bridge to the other side of the scene as well as to the castle. I started off why creating a cylinder and adjusting its size.
After creating the cylinder I increased the subdivision count to allow some more accurate modelling through extruding the faces.
The way in which I extruded the bottom of this was similar to what I did with the towers for the castle. However I extruded the top differently as I had to extrude outwards first, then inwards slightly to create a middle face and then downwards to create the space.
After modelling this I duplicated it and place it on the other side aligned. After aligning them I combined them for them to be a single object as this would allow me to use the bridge tool and connect them easily.
I firstly selected a few faces and used the bridge tool and, seeing that it worked, I proceeded to then selected the remaining faces and using the bridge tool on these too.
Once again I re-used the castle's door to use the Boolean tool and create the gate's gap on this gateway. I had to resize it and redo this a few times to get the right size. Once I got the right size I created the gates by using a simple cube and resizing it to make it thin as well as long enough to be a gate that's halfway closed/open. Once this was done I duplicated this and combined it together once more and used the bridge tool on both sides to join it all together into one object.
This is my first step towards modelling the potion. I created a basic sphere and then created this shape by smoothing it as well as extruding and scaling the upper part.
This is going to be the inside of the potion which will represent the liquid. To create this I made a sphere and cut it in half by selecting the faces on the lower half and deleting then. I filled this space in by using the fill hole tool.
After that I made what would be the cork that would go on top of the potion as a lid.I started off by creating a cylinder and then used the smooth tool alongside the edge line tool to create the shape that I was looking for.
After that I made what would be the cork that would go on top of the potion as a lid.I started off by creating a cylinder and then used the smooth tool alongside the edge line tool to create the shape that I was looking for.
This is what the potion looks like after putting the cork on it and being finished in Maya.
Here I am starting to create a barrel. The first thing that I did was create a basic cube and then scaled the edges to make a suitable shape. After this I used the edge line tool and made it create 10 edges in one go to create some even subdivisions.
Once I finished the barrel through the bends I decided to re-scale it so that it would look more like a barrel because I thought that the one that I made was too long and didn't look very realistic.
After that I used a nonlinear bend to bend the base shape I created. I had to rotate the bend handle a few times to get it to bend in the direction I needed it to. After this I duplicated it about 12 times and combined it to create one single object. Once I combined them I also used the center pivot tool to center the pivot so that it was easier to move it and it was correctly placed. I did this to then use a nonlinear bend once more to bend int horizontally as this would then form the barrel shape that is shown in this image gallery.
When I finished scaling I started creating the wooden planks that make up the lid. To do this I firstly created one basic plank that would then serve as base for the rest. I duplicated it once and then adjusted the vertices to make its shape fit the barrel. I did this once more and then combined the previous two wooden planks. After this I used center pivot to make it correct and then duplicated and rotated it to fit on the other side of the lid.
The next thing that I decided to create is the cork that goes on the wooden lid. To create this I simply made a cylinder and selected the outer vertices. I then scaled these vertices until the shape looked correct.
Here I am created the outside of the barrel. To do this I created a tube that was shaped similar to what I was trying to achieve and then slightly modified it with the scale tool. After this I placed it onto the bottom of the barrel and scaled it accordingly. Once I did this I duplicated it two times. One of them would go on the top without being modified, whilst the other one was modified so that it would fit on the upper quarter of the barrel. Once I managed this I duplicated it and placed it on the bottom quarter.
This shows my process creating the stall, which would be used to showcase my swords and potions. Firstly I created a simple cube and extruded the upper face outwards, and after this upward to create upper part. I then created the base supports by using the magnet tool to be able to create them directly on top of it so that I could get the scale right. After this I duplicated the one I made evenly.
After this I created the remaining supports by using the magnet tool once more. To create the roof I made two supports that went upwards on each side, combined them and then used the bridge tool to connected it. I opted for choosing to do it this way as I thought it would be easier and possibly more accurate than creating individual connections. After finishing the stall I duplicated it and placed it nearby so that they weren't too close together or too far away from each other.
Final Test
Second Playthrough
FMP Final Evaluation
This is a Particle System that I created to replicate the water coming out of the fountain. To do this I first created a simple and basic particle system. Once I did this I changed the values of the start delay, lifetime, speed and size to make the particles the correct size and speeds. I also adjusted the gravity by changing the value of the gravity modifier to a number that made it the most realistic, which in this case was 0.15. I also changed the simulation space to World so that it was in sync with everything else in my project. I also changed the emission rate to 150 as well as adjusting the shape of the particle system so that it would emit the particles correctly. I also had to change the force over lifetime option so that the gravity would affect it near the end of the particle's lifetime. I had to change the color over lifetime option to make it fade out at the end of its lifetime so that it would slowly disappear and create the effect of a water fountain. To make the particles look like water I also made its main color white and gave it a material that made it look like water foam.

The aim of my project was to create a highly detailed Unity environment that was fantasy themed, based on games such as Final Fantasy or Dark Souls and movies such as The Lord of the Rings. I feel that I have met my intentions as when I was creating my environment I paid close attention to many real medieval villages as well as fantasy towns from videogames and created by other people in the 3D modelling industry. I also believe that I met my intentions due to the reactions from many of the people that I showed my work to as they all thought it was fantasy based before I told them this.
I believe that my research in developing my project was good and successful as my research was very varied because I researched video games, artists and mythological stories which are all very different from each other but were all based on fantasy. In my opinion, the most relevant research was the videogames I looked at as well as the mythological swords as most of my inspiration came from these; the three swords that I created were all from mythological tales, and the videogames I researched heavily influenced the shapes of my doors and windows as well as the houses themselves and the layout of the environment. Whilst researching I learned that most medieval and fantasy houses had wooden frames along the edges. I also did some primary research of a village that I lived at in Spain as the buildings were old and decayed, giving a small resemblance of what medieval villages looked like. I mostly relied on my subject knowledge when modelling as well as to keep in mind how everything should look and what techniques should be used for modelling the houses and small details that went on all of the objects.
Whilst developing my idea I decided to play those games that I researched myself and take a free look from many perspectives at the environments. When I was looking at the environments I started to come up with ideas as well as how the town layout could be like. Initially, coming up with ideas was difficult, as I wanted to try to be original with my fantasy town and not make it exactly the same as others such as the ones in the videogames that I researched. I took this into consideration whilst coming up with ideas and decided to get ideas from all of them and then combine these ideas to create something unique. When testing and experimenting, I had the most trouble with modelling and texturing the swords as the modelling was more detailed than anything I had done before and I used a new modelling technique that consisted of using an image plane and putting a transparent plane on top of it to model moving the vertices and edges of the shape, which also involved the edge loop tool to create these. I also had trouble with the UV mapping of these swords, as it took me a few tries to get it right to texture it in Substance Painter. To solve the UV mapping problem I looked at why it was failing and realized that I was accidentally selecting more faces that I needed to which caused the texturing in Substance Painter to fail. I also experimented with Substance Painter, although I already gained a bit of experience on it in the previous units. However, I tried new things in Substance Painter such as using alpha brushes, which allowed me to add in the blade’s detail whilst texturing the Excalibur sword. The toughest part of this new aspect to Substance Painter was making the image an alpha, which I had to do in Photoshop. My biggest experimentation was with the particle system in Unity to create the fountain water, as it was my first time using this. I slowly figured out by myself what I had to do, although it was slightly tedious, as I had to constantly mess with the settings of the particle system.
I decided how I was going to make my final outcome as soon as I came up with the idea, as I thought that by having clear how I was going to do everything it would become easier and I would be less distracted thinking about the how’s. The methods used to create my work were mostly using the extruding tools in Maya to make cubes into different shapes. However, I implemented some other tools that I learned throughout the course such as the Boolean and bridge tools. The Boolean tool was extremely helpful when creating the gateway as well as the castle, and the bridge tool was a big help with the gateway as it allowed me to really easily connect the gateway towers. All of my texturing had to be done at home, as I decided everything would be textured in Substance Painter and this software was not available in the mac that I was using, so I decided that my modelling would be done at college on the macs and the texturing would be done at home on my own personal PC. The disadvantage of this was that once my modelling was done I couldn’t further work on my project until I got home. However, the advantage of this is that my final piece would be incredibly more detailed than if I did my texturing in Maya, as Substance Painter allowed me to make my textures be higher quality and more unique. I would not have changed this at all, as the textures I achieved with Substance Painter were at the standard that I was aiming for.
The audience of my final outcome are teens and young adults that are interested in RPG (role-playing games) and fantasy-themed games. I would expect my audience to play around in my environment if I gave them my project, and hopefully believe that the detail was good and that it successfully resembled a fantasy environment. I believe that my FMP answers my original statement of intent, as I created my environment and developed my ideas based on what I wrote on my statement of intent as well as showing my work to people outside the course to get their feedback on whether it looked like what I was aiming for or not, because I think that getting other people's opinion is important when creating a game environment.
I believe that my final piece was very successful as when I showed other people my final play through they were all very impressed with my work and said that it looked fantasy-themed. This makes me feel good about my final product as it shows that I have achieved what I was aiming for. My website was also very helpful with time management as putting everything on my website as I did it allowed me to quickly look at how much I had done and what I had left.
If I had extra time, I would add some scripting to make it look more like a game and add animations to the swords so that they could be used as weapons.

Final Playthrough
Secondary Research


These are some pictures that I took from some old buildings in a village that I used to live in from Spain. I decided to take these pictures because these buildings reminded me to medieval villages and I thought that it would be useful as research and inspiration for my Final Major Project.