Product Visualisation
Research
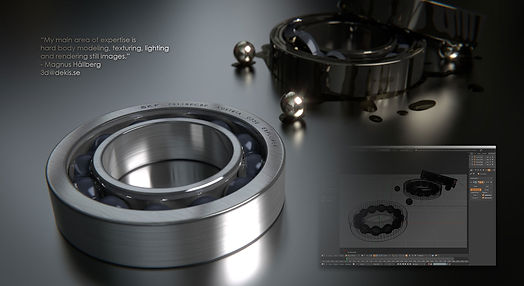
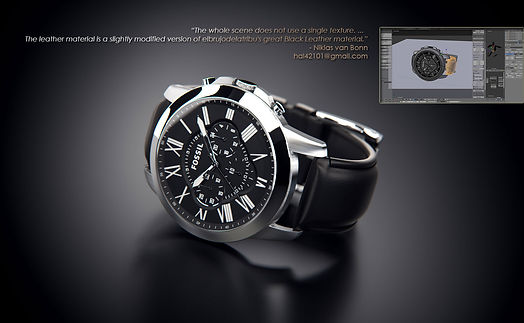
Examples of product visualization

Ideas
These are some examples of product visualisation that I have found online. They were created on similar software to Maya and gives me an idea of what product visualisation is as well as of what I need to do for this unit.


Modelling
My ideas for all of these is to create some slots in different positions from which different attachments would pop out from such as weapons or methods of movement. Some of these ideas include robotic legs, rocket launchers or lasers. I would like to texture the final model on Substance Painter once it's finished so that it looks as realistic as possible and then take the render of it onto Photoshop to insert it into a real background and make it look like it's part of it, which is what product visualization is. I would also like to animate some movement as well as the weapons coming out of the slots so that it's not just a static object.

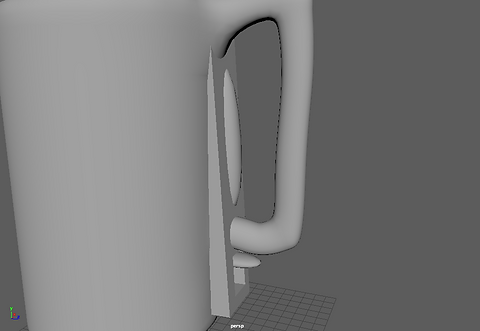
This is the final idea that I chose to model, which is a kettle. This screenshot shows my first step, which was creating the basic shape and handle. I don't like how the handle is currently looking so it's very likely that I will redo it so that it looks better. My goal for it is to make it look curvier like many handles for kettles look like.


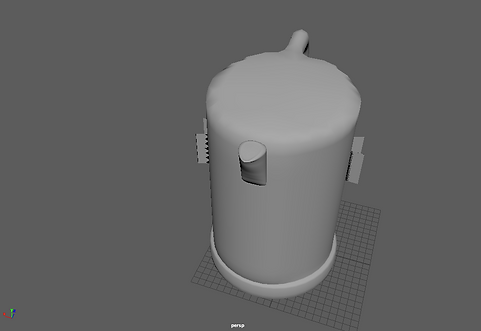


This screenshot shows the switch and extra section that I modeled for the kettle. To do this I simply used the magnet tool on the kettle and created a cube on it as well as a few cylinders that I used for the switch and the metallic section that goes above it. I rotated it so that the handle would fit on it and looked more realistic.
Here I am showing a more far away view of the kettle to show the end that I made for it as well as the scale of the part I modeled before. It was tricky for me to model this as I was initially unable to modify it properly. However I eventually figured out an efficient way and managed to model it.
This is a close-up of what I was previously talking about. I took this to show that I created a lower section at the top as well as making it pointier like my reference image of a kettle. I had to adjust the scale a few times until it looked correct and I may adjust it once more in the future.
In this screenshot I am showing the panels of the sections below the kettle so that the robotic legs can come out. To do this I had to extrude the edge of the face after deleting it. I had to extrude twice so that the black face wasn't noticeable as it wouldn't appear in the render.
Here I am showing the panels of the sections that will include the arms. They will include 2 arms coming out of them, one that will have a weapon and one that will have a hand or utility tool.
This screenshot is to show the inside of the arm section. So that the black faces of the inside weren't visible I had to create a space inside, which I did by extruding various edges until a small cube space was created inside to hide it. This space will be black to imitate the dark inside of the object.
This screenshot is similar to the previous one, but this time showing the inside of the sections located below the kettle. The process was the same, but slightly more complicated as the panels here are connected diagonally so the extrusion method was slightly different and more complex than the previous one.
These are some new panels that I have created on the front of the kettle. These will include some robotic cables that will have some robotic eyes at the end of them. These panels were created using the same method as the other ones.
In this screenshot I am showing the robotic arms that I have modeled. The upper arms will have weapons at the end, whereas the lower ones will have hands or utility tools. I created these arms by using the magnet tool on the kettle and then creating a cylinder on it. After this I periodically extruded it whilst rotating it to change the direction of where it is going.


Ambient Occlusion


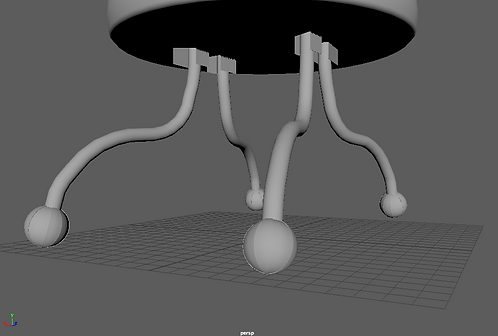
I modeled these robotic legs through the extrusion method on a cylinder. Due to the project having no restrictions towards the polygon count I could extrude it enough times to make it seem more realistic. I made the wheels at the bottom of the legs by using the insert edge line tool on a sphere to divide some of the faces and then extruded them outwards to create those separate sections. I modeled one of them and then duplicated and rotated it to fit it onto each of the other legs.
This eye is connected to the kettle robot through a extruded cylinder similar to the ones shown before. The eye was created by using the magnet tool on the connector and then creating a sphere on it. After creating it I selected a few faces and extruded inwards. I repeated this process once more to create multiple layers in reference to some robotic eyes that I have seen in films and games.
To create this weapon I used the magnet tool on the arm and then created a cylinder on it. I selected the upper face of the cylinder and extruded it multiple times to create the layers. In the final section I made the extrusion smaller and then extruded inwards to create the gap from which the ammunition would come out from. This is intended to be a type of laser gun.
In this weapon I used a similar technique as before but with a more complex shape. It is a type of mini-gun that was shaped differently to make it unique in my robot. To create the barrels of the gun I created one cylinder that was similar to it and I then duplicated it multiple times to replicate the multiple barrels that are characteristic of it.
This is an example of a method of rendering that we were taught. This method consists of applying a new material to the objects, called Ambient Occlusion that makes these objects light up. By using this material it is unnecessary to use any lighting, such as the Sky Dome to make the object visible when rendering with Arnold. I included three of the renders that I made of my kettle robot: one of the back section, one that was a test render which was my first one and therefore shows my robot unfinished and finally one of my finished product non-textured to show off how it looks like rendered in this manner.
Texturing + Compositing


Final Render + Project Evaluation
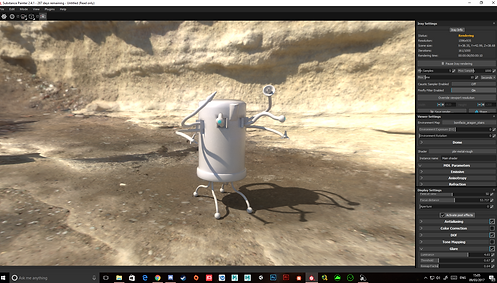
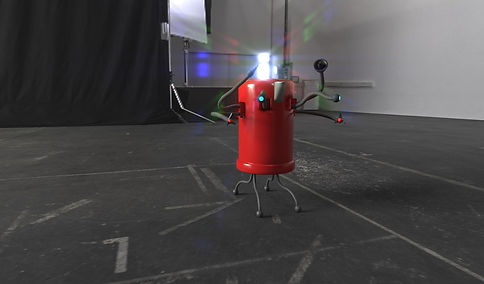
Whilst texturing in Substance Painter I decided to try out the I-Ray render function that is implemented into the program. This was the result given before being completely finished, as the full process can take from 5 to 10 minutes. I thought that it does a good job at compositing and makes it blend in with the real world whilst creating realistic shadows that suit the environment.
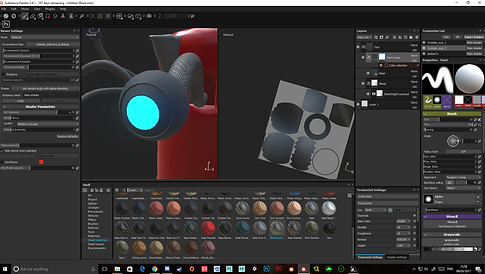
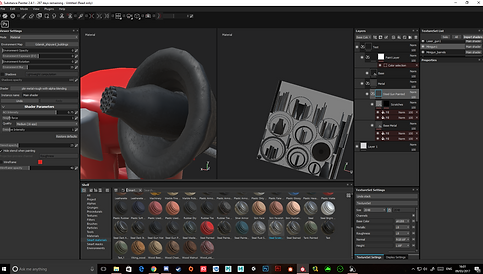
This screenshot shows how the outer and inner sections of the robot's eye was textured. I also added a glowing effect to the eye to make it more robot-like, and I achieved this by creating an emission channel on the inner eye's material and adjusting its settings. I also enabled "post effects" to give the eye that glowing effect that I was trying to achieve. This is probably my favourite screenshot for my project alongside the final render due to how it showcases the glowing effect of the eye.
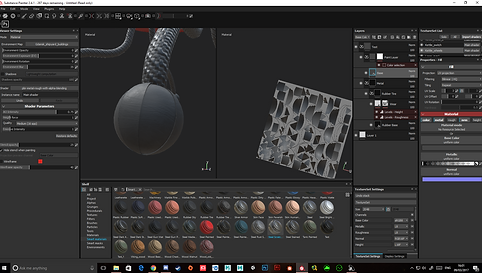
This screenshot shows the eye connector's material. As it is the same one as the arms and legs I didn't take a screenshot of them because this served as an example for all of them. I used a mask so that the base colour didn't change and added a carbon fibre material that gave it this realistic look and texture making it look life-like and similar to other robots that I have seen in games and movies.
In this image you can see one of the two weapons that I textured. To texture it I also used a mask like with the previous one, but this time I gave it a material that was more similar to the steel that guns used, including some scratches.
This is the other weapon that I textured, a laser gun. For this one I decided to give it a slightly more livelier colour as lasers are really bright, therefore I decided to give it a cleaner steel material than the one applied to the mini-gun, showing the difference in the effectiveness and use of each weapon.
I took this screenshot to showcase what the wheels looked like textured. I gave them a rubber-like material that was similar to tires to make it seem like it was an object that had been used multiple times for mobility purposes, as well as to make it look more realistic and similar to the wheels of robots.
This is a screenshot of my robotic hand. Whilst texturing it I decided to give the equivalent of fingers a steel material and then give the base of the hand the same carbon fibre material used for the arms, legs and eye connectors. However, I changed the colour of the base to red instead of being the same as the arms so that it could be distinguished and so that it is clear that it is part of the hand instead of the arm.
This is a movable 3D model of my kettle robot. After finishing the texturing and doing my final render I decided to export it onto a website called Sketchfab that gives you an interactive model of your object. Whilst testing it I noticed that there are unfortunately some glitches with some of the panels, however I couldn't fix this as to fix it I would've had to adjust the panel's position and then re-texture them in Substance Painter, which wasn't possible due to time restrictions. I also couldn't have fixed it throughout my modelling phase as these panels didn't glitch in Maya as well as during the rendering tests that I carried out in both Maya and Substance Painter throughout my modelling and texturing phases.
The theme of the project was to model a household object in a way that would resemble a "James Bond" gadget, which was an appealing theme to me as it allowed me to have creativity and full control over what object I would create as well as what type of gadget it would be, which in my case was a robot. This project also had no polygon count restrictions, which gave me more freedom when modelling as it was one less problem that I didn't have to worry about and also gave me higher possibilities of making a good quality product. The most enjoyable part of the project for me was texturing in Substance Painter as whenever I use this program I am amazed by the realistic materials that I use. Whilst modelling this robot on Substance Painter I also learned a new function which was creating channels, as I created an emission channel on the eye's material to make it glow, giving it a much better look and an effect that made it look more robotic. I also learned how to use ambient occlusion to render objects in Maya. However, I would like to further develop all of my modelling techniques to become even better at modelling as in my opinion it is my weakest point and something that could vastly help me if I got more skillful at it. Throughout this project I researched some games, such as Borderlands' main robot character Claptrap as this robot served as inspiration for the hands of my robot. I also researched some spy gadgets and looked at what they usually look like to get a rough idea of what I should do and create. The most successful part of my project, for me, was the texturing that I did on Substance Painter as I think that the robot looks really realistic and blends in well with the real world in the composition made in my render. The only problem that I encountered in my project was right at the end, as mentioned in the Sketchfab interactive model section as some panels glitch a bit and I did not have enough time to fix them. If I was given the chance to complete the project again I would make sure that the problem with the panels was fixed and would use my improved skills to create a much better and even more realistic robot.
The aim of this unit was to model a household object that was in the spirit of a James Bond gadget and then composite it onto a real photograph to make it seem like it exists in the real world and blends in with the environment
Unit aim
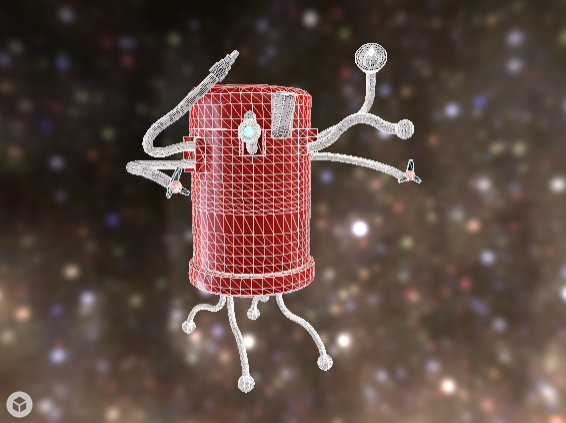
Wireframe Render